When Completing Contacting Steps
It is important to read through the emails thoroughly and follow each step. There are specific links within these emails that will allow you to complete each step. Before starting contracting make sure you have E&O Coverage (professional liability insurance protects you & your business) and access to a void check. E&O Coverage FAQ
If you have been contracted with any insurance carriers in the past, please contact these carriers to check on the status of your contract & writing numbers. If you have active writing numbers we can initiate a transfer. If you are not active we will go through recontracting.

National Producer Number
Check your NPN (National Producer Number). In some states your license number and national
producer
can be two different numbers. For contracting purposes we have to have the correct NPN. Use the
NIPR
link below to look up your NPN. Please take a screenshot of that page and be ready to share with
your
admin.
Look Up Your NPN
Number

Contact Information
When starting contracting you MUST use the same email, name, phone number etc. that’s associated with your licensing. All information that was used to take the state exam and apply for the license must match up during the contracting process.
How to Prepare
E&O Certification
Save your E&O coverage certificate as a PDF. You will need to upload that throughout this process.
VOID Check
Take a photo of the VOID check on your cell phone save it as a PDF.
HCMS Onboarding
HCMS is the first item that will be taken care of. HCMS will basically be your agent profile.
- Your admin will send you an HCMS invite that will come through to your email.
- In that email there will be a button to start onboarding. Click that to start that onboarding process.
Once again, all information entered into the onboarding for HCMS must be the same information that was used throughout the licensing (same name, email, phone number etc).
When going through the HCMS onboarding you may see a message that says “If the NPN is incorrect contact NIPR” Sometimes agents will think this indicates an error but notice that it says IF. Therefore in this situation, review the information you’ve entered and then you should be able to continue/complete HCMS onboarding as long as everything is correct.
If asked to indicate if you’re a business or individual you will select Individual.
SureLC/Surancebay Onboarding
If you run into any issues throughout SureLC onboarding (receiving errors, etc.) it is probably a glitch or IT issue. Please contact SureLC support. There is an option to send an email/message and there is a 800 help desk number. I highly recommend contacting the help desk because SureLC IT reps are usually very helpful and can get the issue resolved.
After completing HCMS onboarding it’s time to start SureLC/Surancebay onboarding.
You will need to go to the email that your admin sent you titled SureLC - Important FFL Contracting Instructions.- Within this email is a specific link that you will need to access & click Register New Account
- To the left hand side of the page you will notice a column of tabs circled in blue. You will work your way through each tab, top to bottom, to provide the indicated information.
- Always click Save & Continue when moving through this onboarding.
Doing Business As:
- Select Individual & leave two boxes below that blank.
- You will need to fill out all of the fields that are required.
- When providing contact information fill out the landline option as well. If you do not have a landline you can use the same number that was used in the cell phone field.
- This is where you will upload your VOID check and bank information.
- The VOID check cannot be larger than 1MB in size.
- Typically if you take a photo of the VOID check on your cell phone, crop out the extra space around the check, save it as a PDF, and then upload, that tends to work.
Licenses: Fill out the required information
FINRA: NO
Questions: Answer the background questions.
History: This can usually be skipped/bypassed.
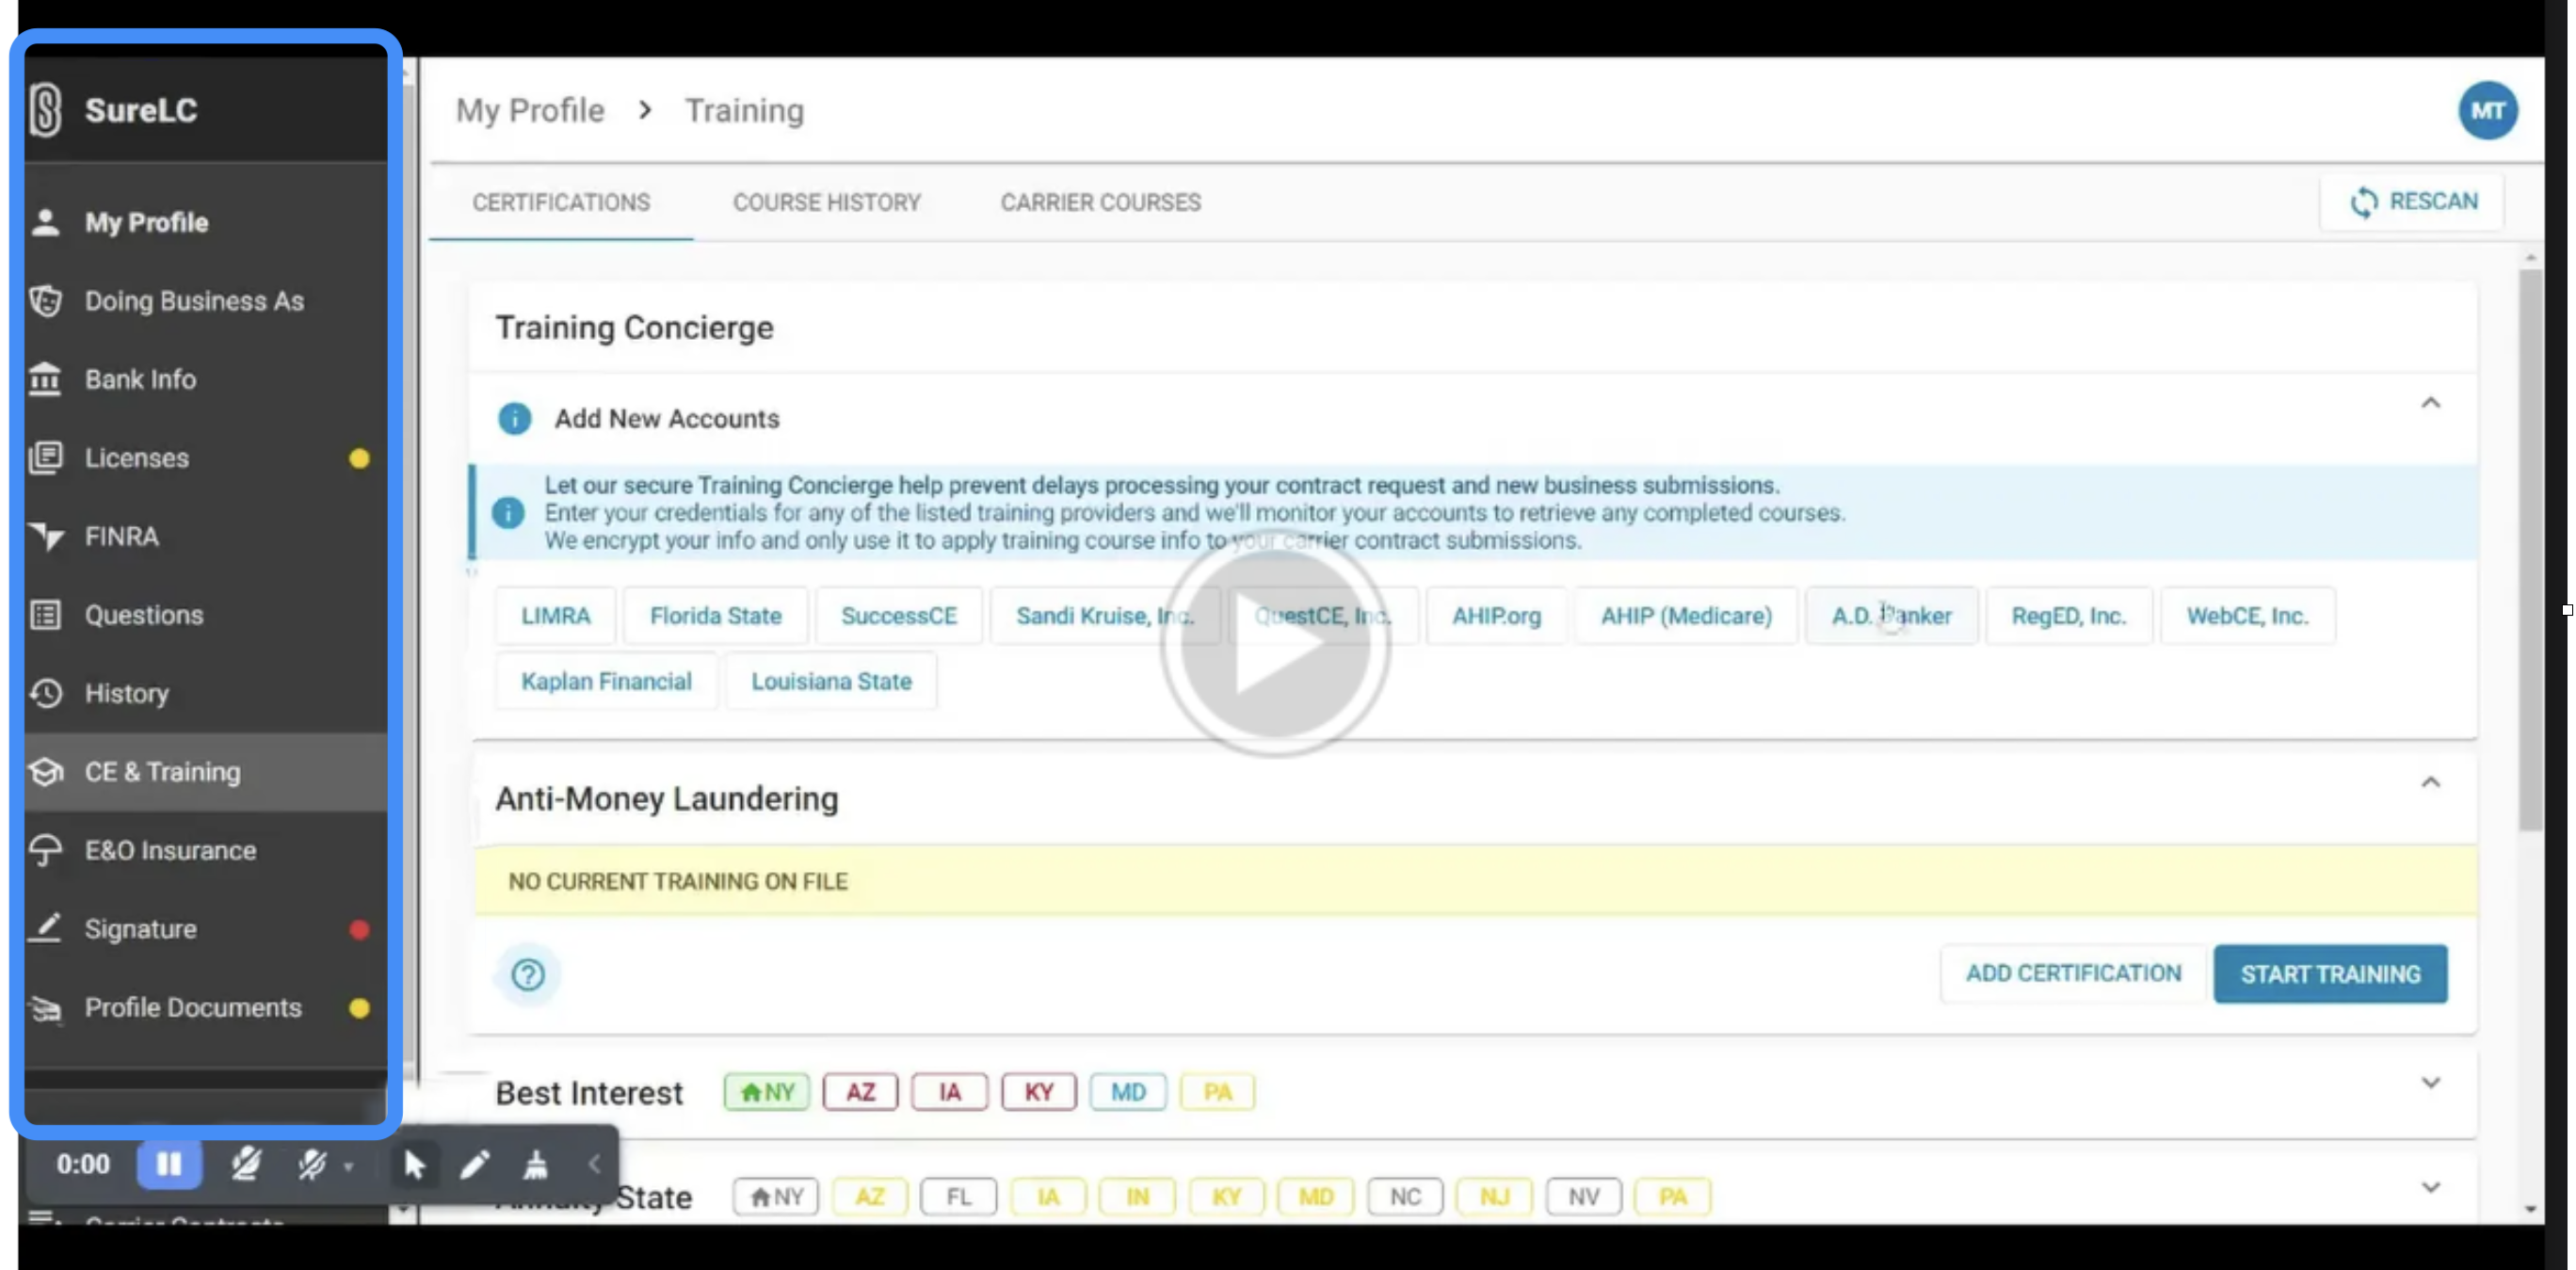
CE & Training:- You will need to complete an AML (Anti-money Laundering) training & take a 10 question quiz.
- Click Start Training and select the FREE SureLC/Surancebay option.
- If you have completed an AML in the past you will still need to take the SureLC training because all carriers accept this training.
- You will need an 80% on the quiz to pass. You can take the quiz as many times as you need to, but the questions will be different to some degree.
- Once you have passed the AML quiz you will download the certificate and save it as a PDF.
- CLICK Add Training to upload AML information. There will be a tab that opens up on the right-hand side of your page to upload this information
- Name/Title: AML (Anti-Money Laundering)
- Select Surancebay
- ID: ID should be in the bottom right-hand corner of the certificate.
- Expiration: The AML lasts for a year. Put a date that’s a year out from the date that you completed. Completion date is on the certificate.
- You will upload and fill out your E&O insurance coverage in this area.
- Case Limit: $1,000,000
- Total Limits: $2,000,000
- Policy #: This can be found on your E&O certificate. It’s usually an ID with letters and numbers.
NLC Onboarding & Contract Request Submissions
To start NLC onboarding access the link in the email that your admin sent to you - NLC Contracting Instructions
- Login with your HCMS login credentials
- Click Lets Get Started
- Mutual of Omaha (MOO)
- Americo
- AIG/Corebridge
- American Amicable (AmAm)
Basic: this information syncs with NIPR and you cannot edit anything in this section at this point. Click NEXT
Beneficiary: this is required so if you have a beneficiary put their information in this area. If you do not have a beneficiary, you can put yourself.- You can always update this later on but these fields must be completed.
- Choose File and upload your VOID check
- You will probably be asked to manually put some bank information in as well.
- You will have to add bank phone number & address.
- You may have this information with your VOID check or on a direct deposit form.
- If you do not have this information, you can google a bank branch near you and use that information.
- Click Save & Continue
- Issued Carrier: add the name of the company your E&O coverage is through.
- Coverage Amount: $1,000,000
- Policy Number: This can be found on your E&O certificate. It’s usually an ID with letters and numbers.
- Issued Date & Expiration Date: This can be found on your certificate as well.
- Upload certificate
- Click Save & Continue
- Click the blue button Add on the right
- A tab will open on the right-hand side of your page:
- Course Type: AML
- Course Provider: Surancebay
- Course Name: select Anti Money Laundering Course
- Enrollment Number/ID: ID should be in the bottom right-hand corner of the certificate.
- Completion Date:The AML lasts for a year. Put a date that’s a year out from the date that you completed. Completion date is on the certificate.
- Choose File and upload certificate
- Click SAVE
- Employment: Click “Save & Continue.” You do not have to fill this out.
- Questions: If you have nothing in your background the answer to most of these will be NO. Question #56: Select YES and you will have to upload your AML information:
- 1st field: Surancebay
- 2nd: Date of completion
- 3rd: Upload certificate again
- Click SAVE & NEXT
- A box will pop up: Click I Agree
Submitting contract request:
You will be submitting 4 contracting request for the following carriers
- Mutual of Omaha (MOO)
- Americo
- AIG/Corebridge
- American Amicable (AmAm)
- Click the blue plus sign at the top of the page & select New Contracting
- Then select one of the 4 carriers that’s listed above.
- Select All
- A pop up will appear, click Close
- Then select your state. You are only selecting the state that your residential license is in. The click DONE.
- You will then see a page that has Select Carrier drop down & Added Carriers Section.
- After you have selected the 4 carriers that were listed on this document, you will click NEXT, and click OK on the box that pops up.
- Click the box beside your AML training & select Add Training to Request. Then click NEXT.
- Click NEXT.
- No need to upload anything unless there's something related to court documents etc.
- This section will autofill per carrier.
- Scroll to the bottom and click CONFIRM.
- Then the page will reroute you to Form Submission. It can take a moment to fully load.
- You will see a blue Read & Review button for each contract request for each carrier.
- Click each blue Read & Review button
- Then there will be a pop up
- You will need to click the box beside I agree statement and then click the blue Confirm button
- A pop up box will appear and you will receive a text code to your phone. This is the signature key that you will enter.
- The password is your login password to NLC account
- Click Submit
- Then on the next page scroll to the very bottom of the page and click NEXT. This will fully submit the request.
Frequently Asked Questions
AML (Anti-Money Laundering)
You will complete the AML training through Surancebay/SureLC - this includes a 10 question CE training.
- CE training is avilable in the tab on the left, click Get Started Now
This certificate will be uploaded when you done completing NLC steps.
On your SureLC/surancebay account, to the left-hand side under my profile, you will see a list of options. SELECT “CE & Training” This is where you will find your certificate.
Set the expiration date a year out from the completion date.
NLC
You will use your HCMS login credentials to log into NLC.
This is where your AML (Anti-Money Laundering) training certificate information will be important.
You will upload your certificate and use the Enrolment/ID number that’s on the certificate.
On NLC you will be looking at you your Dashboard, you will probably see "Welcome YOUR NAME HERE"
- Click the menu option (or hamburger symbol) located beside the circular blue plus sign
- Click Request then Submitted
- Add/create request, Then New Contracting”
- You should then see a drop down with 4 insurance carrier options
On NLC you will be looking at you your Dashboard, you will probably see "Welcome YOUR NAME HERE"
- You need to select the state that you received your license in.
- We will get you licensed in other states later on.
- Americo
- Mutual of Omaha
- AIG/Corebridge
- American Amicable
You will log into your NLC account OR you will receive an email when contracts are approved.
Your NLC logins will be the same as your HCMS login credentials.
https://nlc.chims.uppatop.com/login
If you are unsure about who you are contracted with and you never added the carrier to your
HCMS
portal, refer back to old emails.
Remember: it is very important to add each one of your carriers and your
writing
numbers to
your HCMS portal
If you added your insurance carrier writing numbers into HCMS you can refer to that.
If you did not add your writing numbers into HCMS, you can check NLC and SureLC for contracts.
SureLC
Contact your admin to let them know you are not able to log into SureLC. They could potentially have to contact corporate for a password reset.
After submitting requests for Prosperity, Americo, Mutual of Omaha, AIG/Corebridge and American Amicable connect with your admin once the first 3 are approved. Your admin will instruct you on what other carriers you will be submitting requests for.
Common carriers we will submit contracts for are the following:- Royal Neighbors
- Ethos
- NLG
- AETNA
- Transamerica
E&O Coverage
Yes, we require that each agent get E&O coverage - E&O is professional liability insurance.
Agents can really use whatever as long as there’s a minimum coverage of 1 million.
Most people use the following:- NAPA (Option B on NAPA’s website is usually the most selected among our agents)
- Next
- 360 Coverage
E&O coverage can range from $25 to $50 per month.
HCMS
HCMS is crucial to keep up with carrier requests, compensation levels, uplines, & what insurance carriers you are contracted with.
Each time you get contracted with a new insurance carrier you will receive a specific writing number. These writing numbers and the names of the insurance carrier should be added to your HCMS profile.To add an insurance carrier & writing number you will do the following:
- Click the PLUS sign towards the top left hand corner
- You should see an option New Carrier Request click that option
- Then click the option missing carrier/writing number
- Complete the prompted steps